Floor Plan Instructions and Help
Select the layout that most closely matches your venue by clicking on one of the 8 starter images (top).

You can add Rows and Columns to set areas of the Floor plan.
Click on the Green icon with an Arrow to add a Row or Column. If the arrow faces LEFT, it will add a column to the left of that icon.
For example, to add a Column to the right of the icon, you would click on the green icon with the
white arrow going right. ( )
)
You can also remove rows and columns from set places on the floor plan.
To remove a Row or Column, click on the Red icon
( )
to delete that row or column
)
to delete that row or column
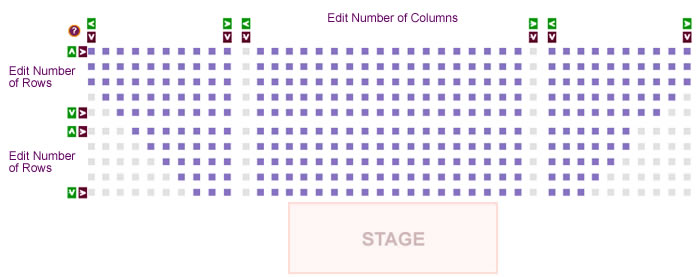
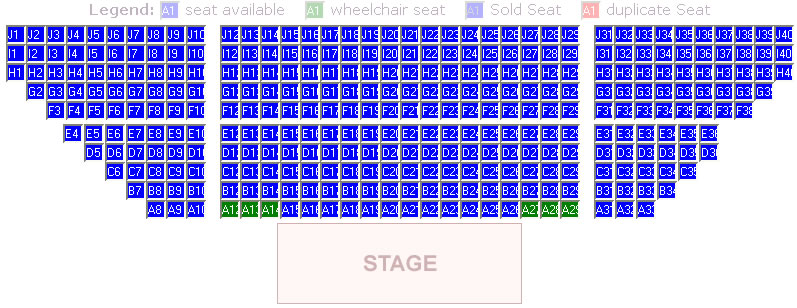
Click on seats to change their properties � either on, off or wheelchair. Turning seats off means they will not be visible on your final seating plan and cannot be allocated � allowing you to �carve out� the exact seating plan for your venue.
If you do not have a screen to change the Seat ID's click on 'Continue to next step' at the bottom of the floor plan editor
Type in the Seat IDs you would like for that seat.
Blue boxes - Normal Seats
Green boxes - Wheelchair Seats
Red Seats - Shows that the Seat ID is being used more than once
If a seat has been sold, you would not be able to change the seat ID. The Seat ID text will change to grey to indicate a sold seat.
When you are happy that the seating plan is correct, click on �Save Floor Plan� at the bottom of the floor plan.
If there are no duplicated seats the floor plan will be saved. A message at the bottom of the floor plan editor will say if the floor plan has been saved or not.
The plan will then be saved under the name of the show / month / year of production. It can be used for future shows exactly as saved, or can be edited if required.